Surface prep of a house’s exterior is vital both for health and safety reasons. It can also make the new paint job look good and last. Here are the basic exterior painting preparation steps to follow to provide the best finish for your prized clients.
1
Remove Contaminants
Although lead paint has been outlawed since 1978, many homes still have lead paint on their walls. If you suspect lead, don't try to scrape or sand it off, and don't do any washing. A contractor who's certified to handle lead abatement must handle the removal of the paint before you get started. Test the paint before you proceed with any further exterior painting prep.
A common contaminant, especially in humid areas, is mold or mildew. Look for black, green or brown stains that may have a fuzzy appearance. If you're not sure whether a given stain is mold or mildew or just dirt, apply common bleach to it. If it bleaches away, you've just killed some mold or mildew.
Use bleach or another EPA-registered microbiocide or fungicide to remove mold and mildew. While bleach alone can work in a 3:1 solution mixed with water, there are more effective, highly concentrated products available. Look for cleaners and degreasers that do double duty, removing not only mold and mildew but also grime, grease and oil.
If you're painting a house in a region where mold and mildew are likely to be continuing problems, add a mildewcide to the paint to prevent your paint job from developing future contaminant problems.
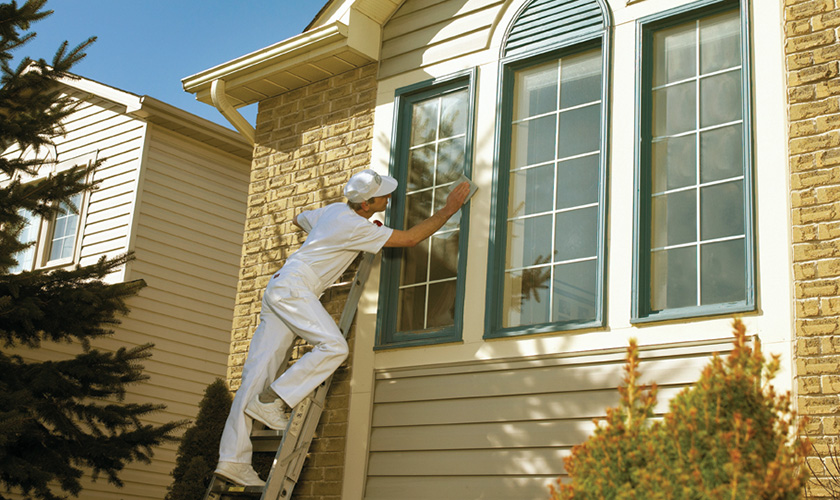
2
Wash the Home
Help the new paint adhere by getting the exterior surfaces of the house as clean as possible before you paint. If the house has existing paint, you can speed up this part of the process by power washing the entire house. Pressure washing is also an option for walls that are stained, although you may want to use gentler options depending on the condition of the wood.
If the house has soft wood siding, avoid power washing as it can damage the wood. Soft woods such as redwood or cedar, especially if they're older and weathered, need to be cleaned by hand-scrubbing with detergent and water.
It's easy to spray down a home's exterior and think that it's clean enough, but if you choose this route, you are likely to regret it later, as the paint may not stick to the older surface. Every minute you spend cleaning the house properly is an investment in a great paint job and a satisfied client at the end of the day.
3
Make Any Needed Repairs and Remove Peeling Paint
Look over the house closely for damage and peeling paint. You may have to fill holes, caulk surfaces and get rid of loose paint. Be meticulous about removing poorly adhering paint, scraping it away by hand. Another option is to use a stiff metal wire brush to scrape it away or use a power sander with a paint-stripping attachment. Work with the grain of the wood as you scrape. When you're working on wood shakes, be aware that bits of the steel wire can become lodged in the soft wood. Remove all these pieces by hand. If you don't, they can damage your paint job and cause later discoloration in the wood. Be sure to wear a dust mask or even a respirator as well as work gloves and eye protection while working with peeling paint.
4
Sand the Exterior Walls
Sanding the exterior walls is necessary to provide a real mechanical bond between the coats of paint. If you don't rough up the surfaces sufficiently, your paint job may look good when you walk away from it, but in just a few years, the paint starts to show all sorts of errors. Especially if you're working with oil-based paint, you may be tempted to just start painting, since oil paint wets the previous coat so well that it sticks well initially and looks great. However, for a finish that will ensure happy, repeat customers, do the sanding work to create a paint job that lasts.
Refresh the surfaces of weathered wood with medium-grit paper. For areas where you're going to use glossy or semigloss paint, such as door and window trim, opt for another pass of sanding with fine-grit paper. Sanding is a crucial step for any paint job, so be sure to pass over all the existing paint thoroughly to create a rough surface that's ready to receive the new paint.
5
Prime the Walls
Priming also helps new paint stick to previously painted surfaces. You need to prime any areas where old paint has already been peeled off, but to create a cohesive paint job that looks good all over, prime the entire house. Priming is especially crucial if you're using a latex paint to paint over a surface that already contains an oil-based paint. Use either an exterior latex primer or an oil-based primer recommended for exterior repainted surfaces, choosing your primer depending on the paint choice.
Choose a light-colored primer or one that supports the paint color you're going to be using. If you're changing the color the house significantly, priming becomes even more important. Once you've primed, don't leave any primed surface unpainted.