Mastering a floor buffer is an essential skill for any wood flooring professional. Buffing, the final stage of the wood floor sanding sequence, is designed to create a surface fit for the final coating by flattening the floor and removing any imperfections left by the drum floor sander or belt floor sander and edger. High-quality buffing can rescue a less-than-perfect sanding job. On the other hand, incorrect use of the buffer can undo all of the previous good work, resulting in scratches and swirls that the unforgiving light from large windows and modern lighting exposes with a vengeance.
It is important to understand how to drive the buffer and choose abrasives and pads to achieve the best results. One way to improve your buffer technique is to read the instructions that come with the machine. However, if these are no longer available, these simple steps can help you learn the ropes.
Good Housekeeping
There is no substitute for keeping a clean and tidy work area and taking good care of yourself and your equipment. Keep these tips in mind when you are using a floor buffer:
• Work safely by making sure your buffer has a correctly grounded electrical plug.
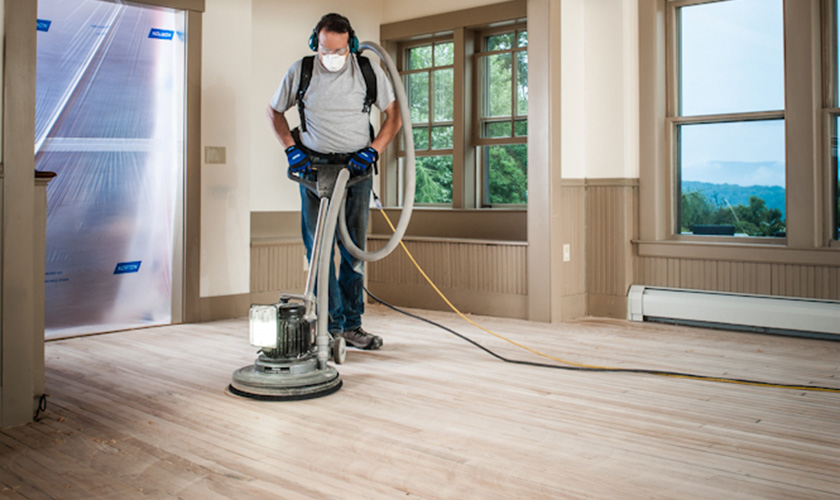
• Dress for safety. Make sure you always wear eye protection and proper respiratory devices, and protect bare skin by wearing long-sleeved tops, long pants and enclosed shoes. Some woods can throw up a dust that causes a highly allergic reaction in some people.
• Clean your buffer before you bring it onto the job site. Be especially vigilant that the wheels don't pick up dust and grit on the buffer's trip from your van to the site. Also, sweep and vacuum the floor to avoid bits of grit getting caught up in the buffer and causing scratches while you work.
• Finally, don't leave your buffer sitting upright on its pad when not in use as this can crush the dust skirt and compress the pad, causing the buffer to run unevenly and make deeper scratches.
Holding and Positioning the Buffer
A buffer is made up of a handle and a motor that rotates counterclockwise at roughly 175 RPM. Adjusting the handle height controls the aggressiveness of the cut. Hold the handle at or a couple of inches below belt-buckle height to produce the most neutral cut. Raise the handle to increase the aggressiveness of the cut and decrease the buffer's cutting area.
The next step is to position and move the buffer correctly to achieve the desired result. Imagine that the buffer motor is a clock face and you are holding the buffer handle at 6:00. The most aggressive cutting takes place in the area between 2:00 and 3:30, while the rest of the area serves to feather the cut. Clock the buffer to mirror the path taken by the drum or belt sander, and use a methodical, egg-shaped sweeping motion to cut parallel to the wood grain. Don’t use a swinging motion, and avoid cutting across the grain as this causes cross-grain scratching.
| Start by using the buffer in a corner or closet away from the light so you can break in a new abrasive disc or screen where any scratching isn’t so visible. Sand the entire room's perimeter, moving from right to left using the egg-shaped motion. Then, sand the rest of the floor, starting at one edge and sanding in a straight row. Be sure the aggressive cut is parallel to the grain. Turn 180 degrees when you reach the opposite edge, and make a return sanding along the same path. Turn and make the second sanding strip so that it overlaps the previous cut by around half the width of the buffer. Return down the same path. Continue in this manner until you’ve covered the entire floor. |  |
If you have to change or flip an abrasive pad in the middle of a room, start off the new abrasive side at the edge, not the center, so it has time to settle into a less abrasive cut by the time it meets up with the place where you broke off. Don't be tempted to keep using an abrasive that’s past its best as this simply burnishes the wood and can cause an unsightly picture framing effect around the perimeter. Finally, know when to stop, as over-buffing can lead to a dish-out effect.
Choose the Best Pad and Abrasive Combination for the Job
As buffing is the final stage of the sanding process before finishing, you must have already taken the floor through a sanding grit sequence. This sequence varies according to the wood, as different woods need different abrasive grades. A resinous wood can quickly clog sandpaper and may need a coarser grit, or it may need changing more regularly. Consult the NWFA's "Technical Manual A200: Wood Species Used in Wood Flooring — Revised Edition" for advice and information.
| You can affect the aggressiveness of the paper disc or screen by varying the driving assembly pad combination. Use increasingly darker-colored driving pads on the buffer to create a flatter, more aggressive cut. If using a double-sided disc screen or abrasive under the buffer, lace the abrasive close to the center to aid smooth operation. Maroon pads are used to abrade water-based finishes. They work by using a non-woven pad with embedded abrasive particles that create a fine scratch in preparation for the next coat of a sealant. Maroon pads are sometimes used with abrasive strips, as they might not be aggressive enough on their own to remove particles from the first coat of sealer. Other color pads include black, blue, red and white, with red and white being the most popular. |  |
Hard Plating
If you’re sanding a patterned or mixed wood floor such as a parquet floor or inlaid flooring, you would choose a large paper disc with a hard plate driver under the buffer. The hard plate normally has a felt pad attached. Using two discs instead of one is a good precaution to increase the support to the abrading disc and decrease the chance of center paper tear-out.
Screening
Use screening to abrade a surface and remove and blend marks from the belt sander and edger. This involves using the buffer with an abrasive open-mesh screen on a driver pad. Screening can also remove scratches caused by hard plating. You may not want to use screening for flattening a floor. Over-screening can cause dish-out of spring wood and can close the wood grain, preventing the finish from adhering properly. Hard-plating is the best way to flatten a floor.