Painting a front door boosts curb appeal with a pop of color. A new coat of paint can give any entryway a fresh look, but getting a smooth, professional finish requires several steps.
Prep the Door
Before buying your paint, determine the type that currently covers the door. Oil-based paint requires a little more work. A quick way to test the current paint is to rub a small amount of denatured or rubbing alcohol on it. Latex paint rubs off while oil-based paint stays. If the current paint is oil-based, use oil-based paint for your update, or use a special bonding primer before applying latex paint.
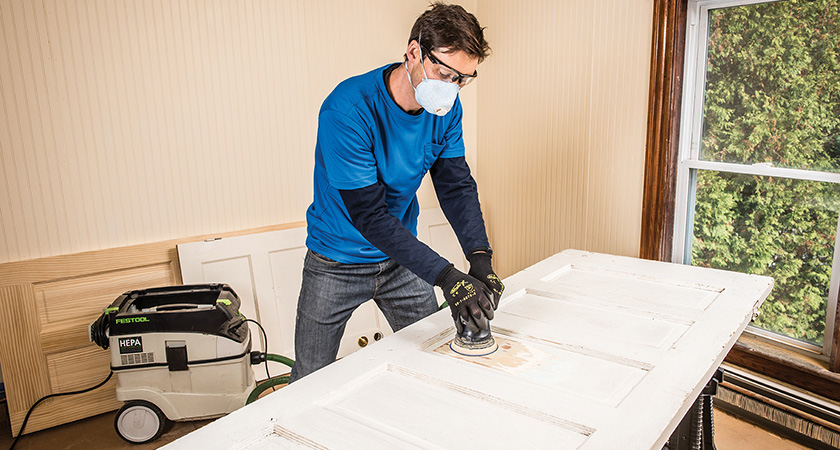
You can either remove the door from its hinges or paint the door while it's in place. Both options offer quality results as long as you take proper care during the prep process. If you remove the door from its hinges, position the door horizontally on a pair of sawhorses in a ventilated space.
Remove the door handle, kick plate, locks and any other hardware for easy painting. Store all of the hardware parts in a zip-top bag so you don't lose anything. If you leave the hardware attached, or if the door features a glass panel, apply painter's tape along the edges to keep paint off the window or hardware.
Exposure to the great outdoors leaves your front door dirty, so take a few minutes to wipe it down before painting. Sand the entire door to help the new paint stick well, remembering to sand the edges since you want to give them a fresh coat of paint as well. Start with medium-grit sandpaper if the door has visible blemishes, rough patches or drips from previous paint jobs. Follow up with fine-grit sandpaper to create a smooth surface. [1] Wipe the door with a clean cloth to remove any sawdust created during the sanding process, and sweep up the floor below to prevent dust from blowing onto the wet paint.
Move furniture and other items away from the door if you're painting it while it's attached. Place a drop cloth below the door to catch stray paint drops.
Prime and Paint the Front Door
A coat of primer on the sanded and cleaned door creates a smooth base for the paint. Brush the primer onto any trim, insets or other small areas that aren't easy to reach with a paint roller. Roll the primer onto the large, flat areas in a thin layer using a 6-inch high-density foam roller to get the smoothest finish. Work from top to bottom. Let the primer dry completely, and lightly sand the primer with your fine sandpaper to get rid of any uneven surfaces. Wipe off the dust generated by sanding with a clean rag.
The paint goes on in a similar manner. Start with the trim and inset detailing. Brush the paint onto those areas, drawing it away from the trim to avoid thicker regions. Roll the paint on the flat areas with a fresh 6-inch high-density foam roller. A regular roller with a low-nap texture also works. Start at the top of the door, and work your way down. This lets you roll away drips as you move.
Apply two to three coats for a quality finish. Let each coat dry, and sand lightly so the next coat sticks. Wipe down the door after sanding. When you're happy with the look, let the paint dry and cure one more time.
Reassemble the Door
Once all the paint dries, it's time to put your hardware back in place. If you removed the door, carefully position it on its hinges. Replace the pins to secure the door. Finally, carefully attach the rest of the hardware to avoid scratching your newly painted door.