
How to Clean Headlights
10 Steps to DIY Headlight Restoration
Headlights are one of the most important safety features on your car. But over time, they can become cloudy, yellowed, or scratched. This can reduce visibility at night and make it more difficult to see other road users. In some cases, it can even lead to a failed MOT.
This guide will show you how to restore your headlights using products from the Norton automotive range. With just a few simple steps, you can remove years of oxidation and dirt, and restore your headlights to their original clarity.
Here's what you'll learn:
- How to identify cloudy, yellowed, or scratched headlights
- The 10-step process for restoring your headlights
- The products you'll need
- Tips for getting the best results
- Before sanding the headlight, clean the area with car soap and water to remove dust and contaminants. It may be worth taping off the headlight to protect the rest of the car from accidently sanding the paint or trim.
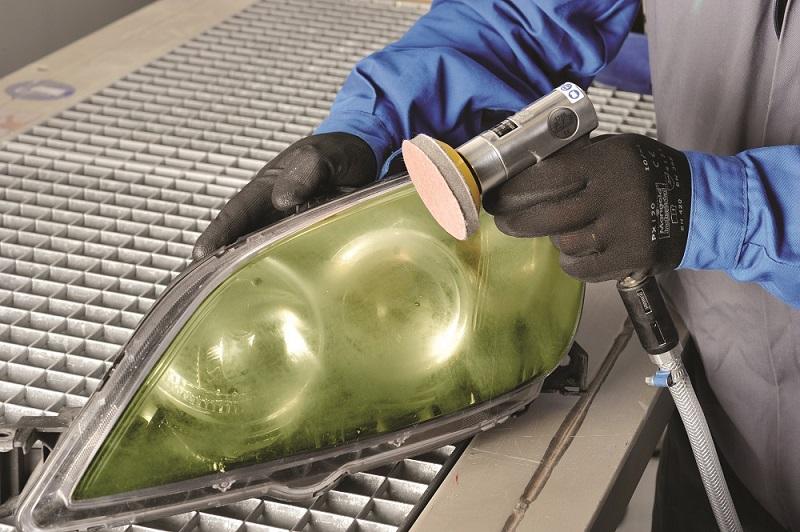
- Start off by dry sanding the area with the most abrasive grit, such as Norton Pro Sanding Sheets in P500 on a 75mm dual active sander. These discs contain a No-Fil coating to prevent the build-up of dust and premature clogging.
- Once you can see a difference, replace the disc with a Norton Multi-Air Plus self-grip disc in P800 with foam interface.
- For the next stage of sanding, wipe the headlight with the blue magnet cloth – to remove dust particles and contaminants from floor sanding.
- Dampen the surface and begin wet sanding with the Norton Ice 1500 grit disc. These discs use a superior grain coating on a super smooth film backing to provide an incredibly fast cut that simply doesn’t load so there are no “pigtails” that take extra time to polish out. The discs also contain Norton No-Fil technology with anti-loading properties to extend life and ensure a perfect finish.
-
The headlight will become clearer and will be ready to wet sand with the Norton Ice 3000 grit disc. These discs are ideal for polishing out even faster in spot repair applications, thanks to the uniform cut, smooth finish and lower scratch depth. The mesh foam is waterproof and moulds to the surface for even distribution of pressure for consistent finish.
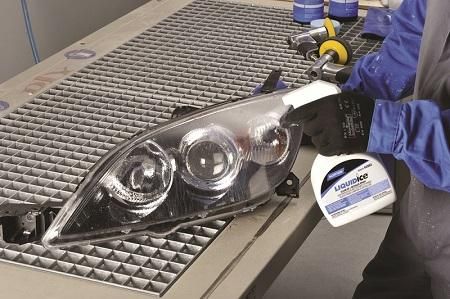
- To reduce polishing time, use Norton Liquid Ice Quick Cut Step 1 polishing compound and polishing head on a 76mm mini polisher. The open structure of the foam retains the compound with little or no splattering.
- For best results, follow with Norton Liquid Ice OEM Step 2 polishing compound and begin sanding with the black foam polishing head.
- Wipe the headlight with blue magnet cloth to remove any final residue.
- To complete the process, use Norton Liquid Ice Detailer Spray to remove any excess polish residue and wipe clean with the blue magnet cloth.
As an optional final stage, you can protect the headlights from further UV damage, by applying a coat of UV resistant clear coat and allow to dry thoroughly.
This headlight restoration process is quick, easy and takes only 15 minutes (not including mounting and assembly).
Take a look at this process in action below:
Download Norton Headlight Repair Process Guide
Visit the DVLA website, for further information on driving and MOTs.
For further advice on car repair, get in touch with our Norton experts.