
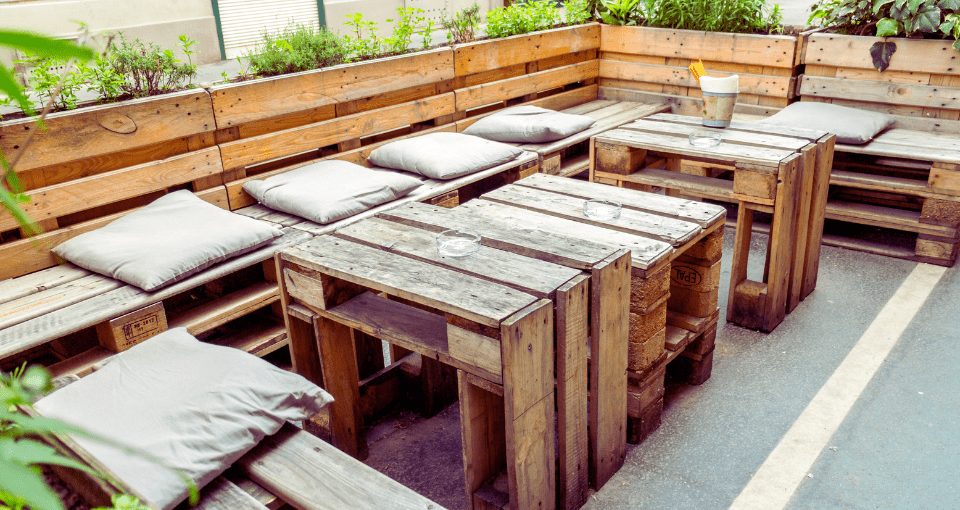
One of the latest DIY home decoration trends is turning wood pallets into furniture to create unique pieces of furniture for your home. A key reason why this woodworking trend is so popular is that it is simple and cost effective to achieve.
This article will cover the following topics:
Why Use Pallet Wood?
Pallet wood can often be found for next to nothing and are usually large and sturdy enough to use as shelves, coffee tables or even as a base for a low bed. There are lots of pallet furniture ideas out there! DIY pallet furniture is a fantastic way to reuse wood that would otherwise be thrown away.
How to make pallet furniture step-by-step:
1. Finding wooden pallets
Ask any local distribution centre or any builders working on residential construction sites to see if they have any pallets going spare.
Before you get stuck into your project, make sure your chosen pallet has no stamp or marking and is stain-free as pallets are susceptible to spills of hazardous liquids during transportation, making them dangerous to use. For example, the National Consumers League (NCL) tested shipping pallets used to transport food and found that 10% of wooden pallets tested contained E.coli and 4% contained listeria*.
To be on the safe side, it may be a good idea to clean and disinfect your pallet with a power washer and allow it completely dry before working on it.

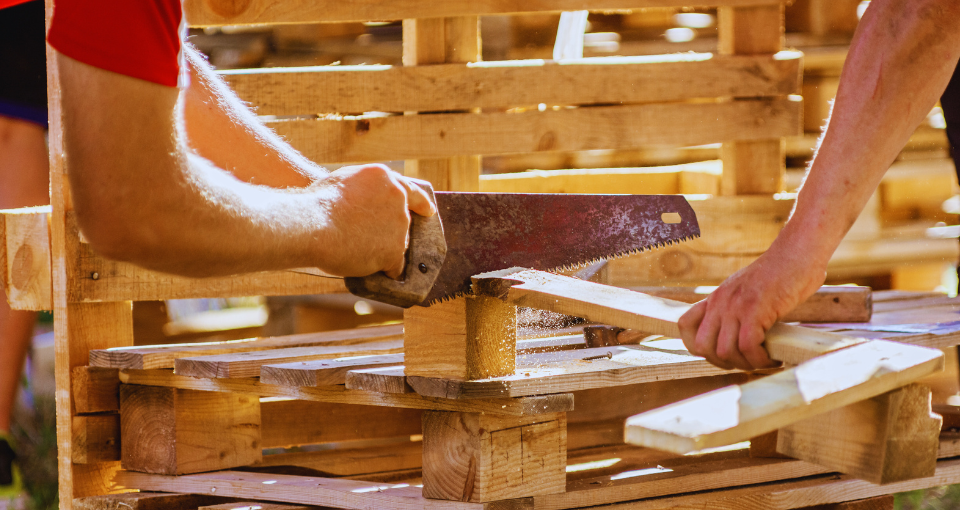
2. Dismantling a pallet
Once you’ve chosen a suitable pallet you will need to break it down into useable pieces, whilst making sure you don't split or break the wood. To help avoid this, don’t cut near any holes, splits or cracks, as this increases the likelihood of the wood splitting or breaking when the wood shrinks over time.
Key tools for the job:
- Reciprocating saw with a 12” demolition or bi-metal blade – ideal for awkward angles. Alternatively, use a cross cut hand saw
- Hammer or pry bar to break apart a pallet without damaging the wood surface
- Nail punch for stubborn ring or screw nails
- PPE including safety glasses, gloves and dust mask.

3. Preparing your Pallet
Before you start assembling your materials, you will need to sand them down to get rid of any rough edges and avoid splinters.
Make sure you have enough space and good ventilation, ideally working outside. It’s also a good idea to lay down some dust sheets.
To sand wood pallets, use sandpaper sheets or rolls in a medium grit (e.g. 80) and gently sand all areas of the piece to remove rough edges, working in the direction of the wood grain. Sanding across the grain leaves scratches which become obvious if you choose to apply a coat of paint, stain or varnish afterwards. Move up the grit sizes to achieve a smooth finish. Read more about choosing the right sandpaper and sanding by hand.
Recommended products:
Norton Expert Rolls and Sheets for Sanding Wood
Oakey Superflex - it includes a strong cloth backing for curved and contoured wooden surfaces.
Oakey Liberty Green - features premium aluminium oxide that is non-clogging, to make those tough sanding jobs, easier and faster.
Oakey General Purpose - constructed with aluminium oxide grains and is ideal for small sanding jobs, such as a pallet shelf.

4. The Final Finish
Depending on the look you’re going for, or if you’re planning to use your finished piece as outdoor pallet garden furniture, you might want to finish it off with oil, wax or a decking sealer to add durability and weather-proofing.
Wood stains are the way to go if you want to highlight the grain of the wood, but make sure to apply a clear top coat to protect the wood from water damage or scratches. You can either use a varnish stain to simply provide a protective coat or add a coloured stain to darken the wood and add colour to it.
However, if you want to hide most of its imperfections, painting the wood would be a good option, plus you can match the colour to other furniture in your home. To create a more rustic look, skip any primer and only apply one light coat of paint - don’t be concerned about applying full coverage so it still retains some character. You can always use a finer sandpaper, with a grit of 120-140, to allow some of the wood grain to show back through.
Recommended products:
Norton Expert Rolls and Sheets for Sanding Wood
Oakey Superflex - it includes a strong cloth backing for curved and contoured wooden surfaces.
Oakey Between Coats - the premium aluminium oxide will not clog and is designed to provide the smoothest and perfect finish when sanding between coats of paint, varnish or stain.

Get Started
Now you’re ready to get started, use our distributor locator to see where you can buy Norton and Oakey sanding products at DIY and Decorative stores to help make your DIY furniture using pallets. Some ideas to get you started include a picnic bench, seating, bed frames, shelves, bookcases, a child’s mud kitchen or garden furniture using pallets. The possibilities are endless!
If you're feeling particularly creative, you could make your own pallet furniture cushions, to make sure your seating is comfortable and to add that extra finishing touch!
Find out more ideas for your next upcycling project here or visit the DIY section. If you want any further information, contact our Customer Services team.
*https://www.nclnet.org/unsanitary_shipping_pallets_posing_threats_to_food_safety